![Workshop Experience Begins [Part 1. Cutting and Sewing]](http://takaokaya-kyoto.com/cdn/shop/articles/Blog_3_1445x.jpg?v=1592202211)
As a new employee, it was necessary for me to be trained in some areas to make sure that I understand what Takaokaya is all about. I started my training in the product packing and delivery area. From this, I learned the different types of products that are made by Takaokaya and what needed to be done before our product reaches the hand of our customers.
After a couple of months of the first phase of my training, my mentor Matsuo-san and our President (who I shall refer to as 'Shachou' from here on, which means company president in Japanese) decided that I was reading for the second phase of my training. I was given the opportunity to learn how some of our products were made from the craftsman themselves.
My training starts at the beginning of June and will last for about two weeks. I will learn according to the four steps in which a normal Takaokaya product is made: (1) Cutting, (2) Sewing, (3) Stuffing, and (4) Finishing.
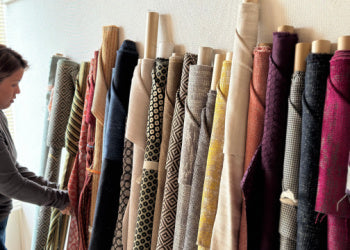
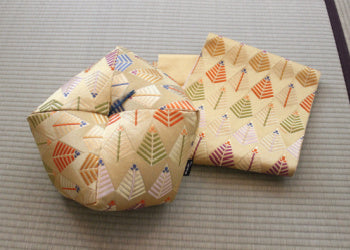
In the first two days, I learned how to cut fabrics that will then be used to make our famous Ojami cushion. It is quite a straight forward procedure involving a stencil, fabrics, and a massive pair of scissors. Even though the process seems quite simple, how well this process is done will definitely define the final outcome tremendously.
There is a lot of detail that needs to be taken into consideration when doing this process. From which direction was the fabric weaved, this decides where the stencil is placed and how the fabric will be cut.
When placing the stencil, we need to make sure that the fabric grainline is facing the right direction and is not pulled in weird angles and overall free of wrinkles, so it is usually necessary to iron each piece one layer at a time beforehand.
For an Ojami cushion, it takes four layers of fabric to create one Ojami cushion, so it is necessary to group them together when cutting, allowing it to be easier for the craftsmen to use afterward.
After cutting, we proceeded to the sewing part of the production. In this process, I learned to use the sewing machine, how to fill the pipe filled product such as our Cojami pillow, and I also learned how to iron prep the sewed fabric before it could proceed to the stuffing process.
When filling the pipe stuffing into our pillows and cushions, the first thing that needs to be done is to weigh the filling, to make sure we are inserting the correct amount of filling needed. This is done by hand with a digital scale. Next, we use a big funnel to pour the stuffing inside the covers. Seeing all the pipe slide into the funnel was really satisfying to watch.


I also learned that after the product covers are sewn, there needs to be some prep work done before they can be sent to the stuffing section of the workshop. One, in particular, is the linen type of the Kyoto Zabuton products.
This product comes with the inner filling liner and outer linen cover that need to be seam folded and ironed to create a crisp edge on the final product. The linen type cover was especially finicky. Due to the nature of the linen, it would be hard to iron and keep its fold, so before the ironing process, the seam needed to be folded by hand one by one on each side and then ironed afterward.


I particularly enjoyed learning how to use the sewing machine. Since I've always wanted to learn how to use a sewing machine, it was such a great experience to have under my belt. The difficult bit was prepping the machine before use, which entails figuring out where each thread goes along up until the needlepoint, making sure that the bobbin is secured properly under the machine and more.
I learned a lot in the first week of my workshop training and I was really excited to see what I will be learning next.


